Showing posts with label Off the page. Show all posts

Thursday, 11 May 2017

I do believe it's time for an Adventure.....

As promised I'm back today to share with you my Travel Journal preparations. I have gone ahead an decorated the first few pages ready for my jottings at the airport and during the flight.  I used a Kaisercraft film strip edge stamp for the borders of my pages. By the way, the pages look a little bubbly because I've glued every second page together, firstly because there were too many pages in this spiral bound book plus I wanted my pages to be a bit stronger to support anything heavy that I may glue into it.


I found a pack of lovely envelopes that fit perfectly (sideways) into the Journal. I cut one end off it ready to slip some mementos into it without having to untie the string closure. I decorated this one with stamps, tags etc.

I borrowed this little photo from the internet, decorated it and printed with my new "whizz-bang" HP Sprocket (more about this little wonder at the end of this post). The aeroplane on the right page is from my well-travelled friend, Lizzy Hill.  I'll be taking a few rolls of washi tape to stick mementos onto my pages and for decoration.

I have a beautiful Postcard stamp from Stampin' Up! that I love using on my travel projects, so it goes without saying that this has made an appearance in this Journal. All ready for my journalling. If you stalk your local Post Office, you'll find the little Air Mail stamps for free. The Washi Tape at the bottom of the left page is an appropriate happy find :)  

This "Today was" card is also compliments of Lizzy Hill. She was kind enough to send me a beautiful hand-made folder full of fun travel embellishments. A lot of them will be coming with me and the remainder will await my return for our travel album.

The remainder of the Journal is decorated similar to this. I plan on filling the pages with ephemera and maybe a few of my thoughts and discoveries.

So, a little bit about the HP "Sprocket"....but first a couple of pics of the small stash that I'm taking with me. These fit perfectly into a plastic zip folder from Office Works. The only thing that doesn't fit is my small pencil case containing a couple of good pens, black and a few coloured sharpies, and a couple of tiny Kaisercraft ink pads. This folder is slightly bigger than A4 and once closed with everything in it has a width of 4cm, so it won't be taking up much space in my carry-on bag.


I wanted to share with you this fun little sticky-note pad I found at Office Works. I'm looking forward to adding some words to this little beauty!

Now onto the game-changer!  I originally was going to leave space in my Journal to stick photos in after our trip. However recently I happened upon an advert for the HP Sprocket. Very timely I must say because this wonderful little machine prints 2"x3" photos directly from a phone app using NO INK!  Yes you read it here!  I have no idea how that even works but the App also allows you to edit your photos and play around with them.  Now you're thinking why on earth I'd want to cart around a photo printer while travelling. Well here's the thing....this little printer is the same size as my iphone, maybe a tad thicker!  I know right!!

It comes with a pack of paper and I have purchased a couple more. The paper is a tad on the expensive side but I won't be using a lot of it. The photo quality isn't perfect but great for just adding a few significant pics into my Journal whilst travelling.

All that is required is to charge it up with the included cord, insert the paper (there are instructions on YouTube), download the App and it's ready to go. Oh and I forgot to mention that the photo paper has adhesive backing! So all I have to do is print off a couple of pics that I've taken that day & stick them in my Journal when I sit down to write. It fits perfectly in this hard-shell pencil case I found at Woolworths, along with my phone charger (I have stored the extra photo paper underneath the Sprocket). Again, this won't take up much space in my carry-on. As a side note, call me old-fashioned but I still use an actual camera. I can't get the best quality from photos taken on my phone when I want to enlarge them so my little trusty point & shoot will be making this trip with us again.


So there you have it, all my Travel Journalling requirements are sorted. I suppose I need to pack clothes too, but hey! priorities people!

Until next time, take care xx

Wednesday, 12 April 2017

Explosion Box for Baby....first attempt

Good morning all! It's quite a busy time leading up to Easter. It's the busiest and most crowded time of the year in my home town. Finding a car park is like winning the lottery! The Autumn weather is beautiful and the town and countryside is looking magnificent, so no wonder everyone from near and far want to visit over the four day Easter break. We'll be playing host to our visiting family, so we are all very excited to be spending time together. I'm hoping to get some great photos too! They've been few and far between of late :(  In the meantime I've been experimenting with a project I've been wanting to do for a while now. A work colleague of mine is due to have her baby very soon and I wanted to make an explosion box for her. This is my first attempt and I must say it was lots of fun (once I figured out the correct lid dimensions and how to embellish it).

I found the box measurements on Pinterest, decided on the colour scheme (as I don't know if the baby will be a blue or a pink). I then cut, embossed and die cut the base for the inside of the box.


The lid was a bit trickier because the measurements from Pinterest weren't correct and squashed the box up too much when closed so I had to re-jig the measurements. Sorry about the dappled light from my window.


So let the fun and games begin! I found some quotes online and typed them up onto some Bazzil cardstock and die cut them with a circle die that would fit nicely in the middle of the doily die cuts. I chose some wooden embellies, flowers, leaf sprigs and flourishes and played around with them until I was happy with the arrangement. The wooden heart was covered in paper and the "cherish" word was coated in a Viva Perlen-Pen in White Ice.


Then it was time to glue everything in place and decorate the lid. I don't have a lot of baby-themed embellishments (well actually I have zero baby-themed embellies, only stamps) so I just went with flowers and leaves.

 I'm not sure who are the authors of these quotes, so I'm unable to give credit but will rectify when I find out who they are.


I had a little box that I was given at a baby-shower a few years ago that I saved (of course!). It fitted perfectly in the centre of the explosion box. I cut the top off it, wrapped a little yellow ribbon around it and bought a tiny pair of bunny socks to fill the smaller box.


I love how the bunny is poking its head out :)

I hot-glued a satin ribbon to the bottom of the box then tied it around the whole thing to keep the lid from falling off.


All in all there were quite a few hours work in this, but only because I was unsure of what I was doing. I'll be doing another one of these very soon all going to plan, so stay tuned.  Thanks for dropping by xx

Sunday, 20 November 2016

What I've been playing with....


Hello everyone and welcome back to my humble blog. I just want to share a mixed media project that I've been working on for a few weeks. The back story for this is when our daughter lived overseas for a few years she sent me an array of beautiful hand-written cards, postcards from all the Countries that they visited and entertaining emails filled with details of their day-to-day life and all the challenges that come with living and working in a different Country.  She also sent me a few small pieces of memorabilia. I've had all this sitting in a bag waiting for a permanent home. I finally rummaged through my "empty box" stash and found a sturdy, cardboard box just crying out to be altered and this has become the new home for the two years worth of happy mail from our girl :)

I have to say that this project has ended up nothing like it started out. I thought bright, happy colours were the way to go with lots of texture. However my mood changed after I layed down my original colour choice (and sadly those of you who know me more closely will understand why this happened). But in the end I still went with one of my favourite colour tones. The original texture is still there underneath all the layers that I added. Here is the finished product:


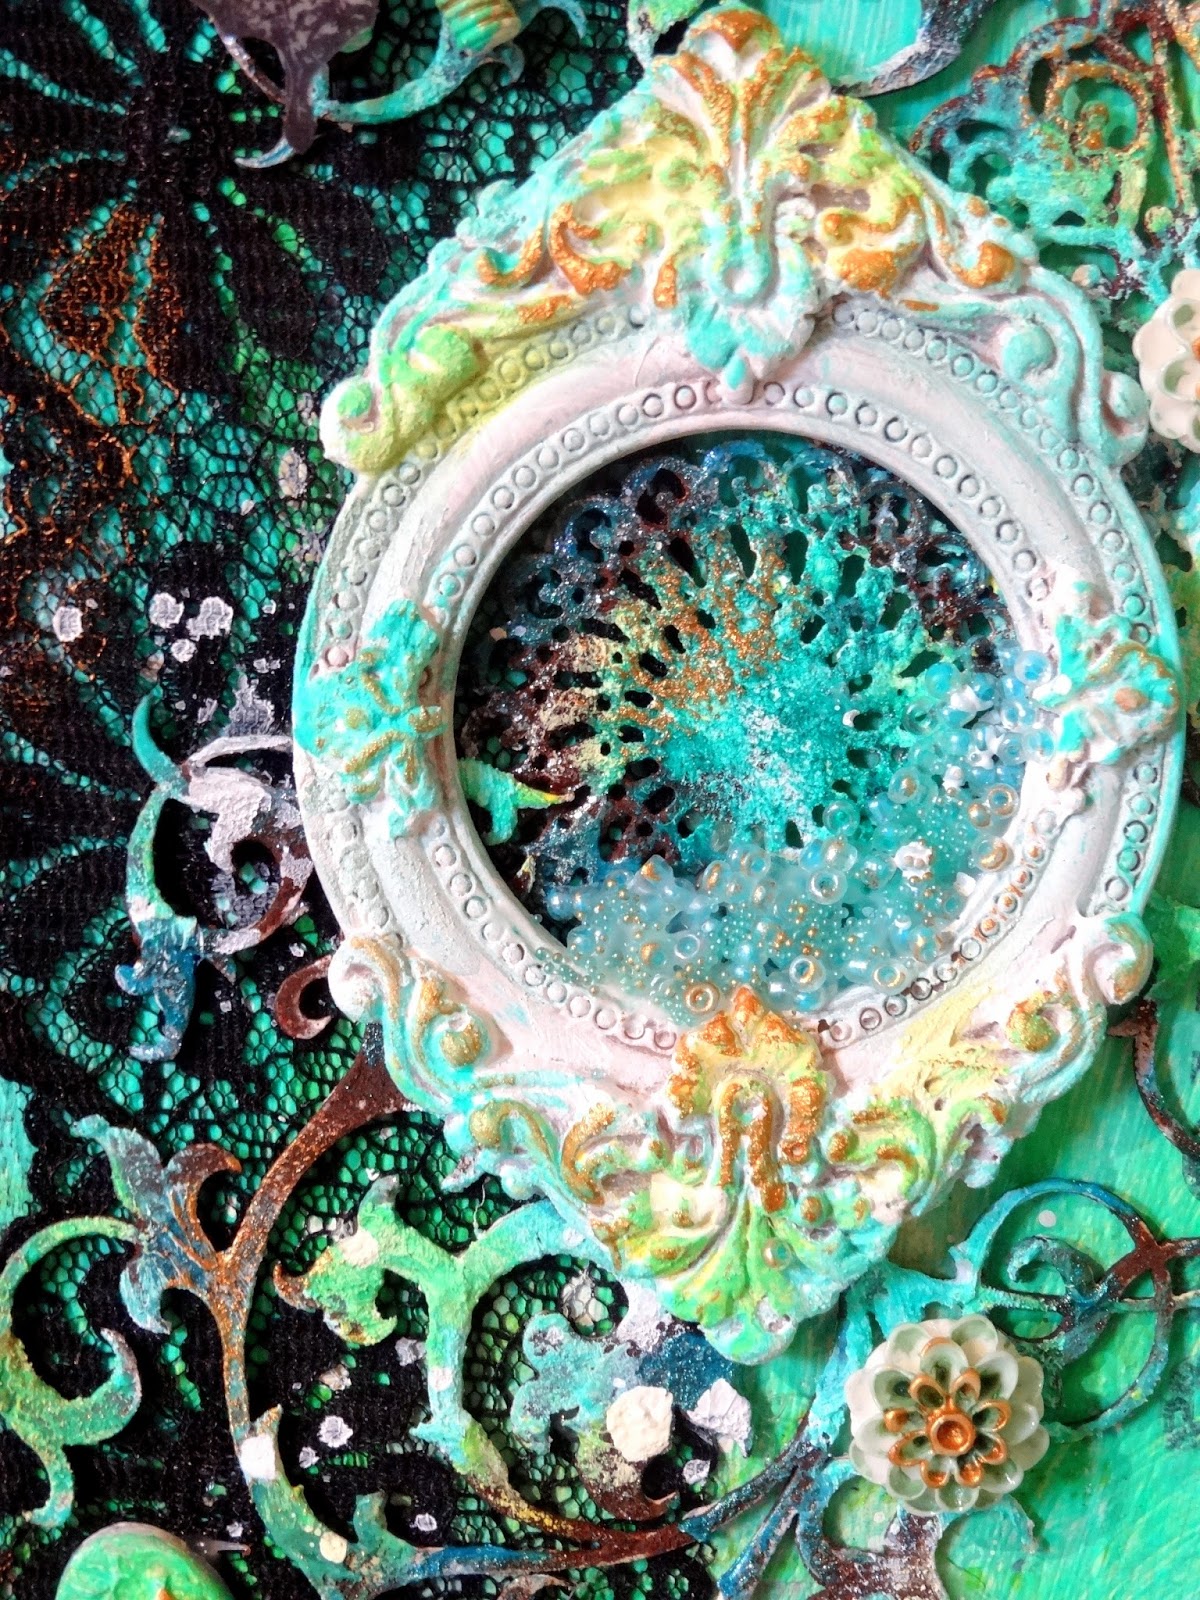
I rusted up some of the metal and chipboard elements then added paint and inks. I also used Inka Gold to swipe over it in random places.


I added some tiny seed beads to the inside of the frame.


My box full of memories...


So now that I've got that out of my system, it's time to get cracking on some Christmas cards and projects.  Thank you for dropping by once again xx

Wednesday, 28 September 2016

Weekend Getaway Projects

Hello again everyone, it's been a bit long-winded between blog posts I'm sorry. However I'm just back from a wonderful weekend in the Blue Mountains with my scrapping kindred spirits. I just want to quickly share with you a couple of the projects that I made over the weekend. The first is my entry for the challenge at More Than Words .  For my "recipe" I used Die cuts (skeleton leaves), Flair, Flowers and Mist and of course the word "Delight".


Here is how I cooked it up:


I love an Aqua and White colour combo. The flowers, sequined bow & arrow are from D-lish Scraps. The photo is a one of my DD & her partner on their recent trip to Thailand. The photo isn't perfect, but it captures their "delight" at travelling to foreign shores once again. 


Again I've included a pretty cluster using my die cut skeleton leaves - one of my favourite dies.


The other project I achieved over the weekend was a canvas that I've been wanting to do for a very long time.


The paint brush is an old one of my Dad's which I grabbed from him before he threw it out. It has some lovely bits of rust and calcium build-up on it so I've tried to reproduce that on the canvas. Thank you to Mary Bennetts for the Title inspiration, Lizzy Hill for her colour and texture guidance and Cheryl O'Brien for coming to the rescue with the perfect Mist. It was a real team effort :)
The background is stenciled with texure paste and coated with a thick layer of Tim Holtz Distress Crackle Paint.


I had so much fun creating this and I can't wait to do another.  I'll be back in the next few days with a few of the other projects from our weekend away.  Thanks for calling in xx

Monday, 27 June 2016

Mixed Media & Re-purposing...

Hello and welcome back to my humble blog. If you are living in the Mid to South Eastern States of Australia at the moment you'll hopefully be taking advantage of the near-blizzard conditions to get some creating done. If not, I'm very jealous :(   However, the shortest day of the year has come and gone, so I'm looking forward to longer daylight hours very soon. I've been ensconced in front of our cosy fire most of the weekend altering a set of pre-loved bookends. This is just one of a multitude of projects I've been trying to get around to doing and I'm pretty chuffed that I finally finished them.


Lots and lots of texture layers using different mediums were used on this. The Kaisercraft timber letters are a recent purchase specifically for this project, but everything else is what I found in my stash.


The chippy clock behind the letters is from 2Crafty and I've covered it in Structure paste to get a really gritty, rough surface. I also used the same on the clock hands. I cut the clock in half to add to both sides of the bookends.


Except for the Tim Holtz film strip, everything on this has been altered in some way. The flowers were cream and I used water colour paints to change them as well as on the cameos. Heidi Swapp Colour Shine was also used, with a paint brush, as well as Viva 3D Gold paint and Kaisercraft Antique White paint.


I first covered the whole thing with newsprint paper and Gesso before adding some stencilled lettering with texture paste.


I added a chipboard semi circle and a metal butterfly to both sides as well as some German scrap pen nibs which I painted gold. Using my finger I rubbed a bit of gold paint over the lettering to make it stand out more.


I have probably said it before but.... hot glue guns and I have a love-hate relationship, but I managed to take a bit more control of it this time, so I think we are coming to some kind of understanding :D
Here is the finished product on a table in the corner of my library. It now holds the books that I am yet to read (when one is read another seems to take its place! I'm sure they are breeding), otherwise if they go straight into my bookcase I tend forget about them.

It has been a long time since I've altered anything and I really enjoyed the process despite the long wait between drying times.  Thanks again for dropping by xx


Thursday, 31 December 2015

Farewell 2015...

Happy New Year to you all, I hope it is a very healthy and prosperous one for you. I'm looking forward to 2016 and all the new and exciting adventures it may bring. I wanted to upload one last project for the year to share with you. This is a frame that I made for our DD for her new little home and the close ups that I posted a few weeks ago:

I went with a seafoam/mint and soft pink colour scheme. The lovely background pp is from Kaisercraft. This little bird is from Prima as is the die that I used for the leaves.  The wooden heart which I altered is also from Prima.


I had to included a little wooden globe (Kaisercraft) which represents all her travels. I altered it with paint and clear crackle paint then I let some drops of mist run through the cracks. 

The fantastic large chipboard clock is one I've had in my stash forever and I finally found a project to use it on. I gessoed it then added "structure" paste. Once dried I added mists and paint. I then spread some clear glue around and sprinkled on the seed beads.

Here is the finished project. I covered the Kaisercraft wooden "Love" word with a matching subtle glitter paper and some small wooden letters were painted in the same tones. The little white heart on the right lower corner is from Prima. Sorry about the dodgy photo :(


There is a little bit of glare off the glass in this pic. It is a 38x38cm (15x15 inch) frame and 30x30cm (12x12 inch) with the white mat frame inside.

Thanks for looking and I look forward to sharing some more inspo in the new year xx

Sunday, 23 August 2015

Mixed Media Creative Gym Exercise #11: Rusted & Rustical

Okay so I'm slightly obsessed about learning all I can about mixed media (along many other obsessions in the industry). So I'm currently following the challenges over at Mixed Media Place because I really want to learn more and extend what I already know about creating with mixed media. The designers over at Mixed Media Place are so talented and innovative.

The current challenge is to use one of the wonderful Art Recipes from the very talented Finnabair as inspiration.


After much deliberation I chose to use Finnabair's Art Recipe July this year: "Rusted and Rustical". You don't have to make the same project or even follow the recipe step by step. What inspired me about this recipe was the rusting. So this is what I came up with (I've highlighted the products that were used on this):


I've been wanting to use my old paint brushes on a project for ages and when I finally came across a cheap mdf artists pallet I knew what I wanted to do. After covering my project with news print paper and Gesso,  I "rusted" up the metal pieces on the brushes as well as the cogs with rusting powder and brown vinegar. I then glued them to the project with a hot glue gun.


I then threw some rusting powder around them on the background and added some Tattered Angels Glimmer Glaze in Indian Summer. I also used Modelling Paste for the flourish and quote, 3D Gel Medium to hold the beads in place and to cover them ready for colouring.


Once the modelling paste was dry I cover it with Ranger Crackle Pain. I stamped the background with a Kaisercraft background stamp and Tim Holtz Distress Ink in Tea Dye and then used a aqua pen to move the ink around. The aqua brush was also used with water colour paint to smudge and blur the flourish. I laid down some old crochet pieces under the brushes before adding the embellishments. Also added some drips of Prima Colour Bloom in "Berry Wine" which happily settled within the crackle paint.


I painted up the embellies and flowers using Gesso, Aquamarine acrylic paint, Heidi Swapp Colour Shine in "Mint" (also used on the background), Prima Colour Bloom in "Deep Teal". I added some aquamarine paint on the rusted cogs. Glimmer Glaze was also dabbed onto the flower petals here and there.

Happily this project really stretched my creative imagination and I'm pleased that I got to use such a variety of media on this piece. I would really appreciate any feedback/advice from any of the Mixed Media Place Design Team on any improvements or tips/tricks to improve my techniques :)  Thanks for looking xx

Thursday, 28 May 2015

My first Commissioned work done and dusted!

Hello everyone! I was thrilled (& a tad nervous) to have been asked by a work colleague to create some wall art for a baby's room. My colleague was so impressed by the photos that I showed her of my previous creation, that she just "had" to have one to give to her friend's new baby but with the baby's name and date of birth included. The frame I used for this was larger and perfect to use for 3D & it also included the glass - so I'm sorry about the reflection that occurred when I took these photos.


And a closie (a very cool date of birth don't you think?!)


This frame was a little easier in that it was gender-specific, however I've always been uncomfortable with creating "boy" themes. Wrapping the letters with embroidery cotton is sooooo time-consuming, so I may have to re-think that for any future orders, even though I love the texture it adds. I also love the little wooden buttons and wood veneer transport embellies, all of which are from Craft Queen. I stamped & fussy-cut the little animals and added the "googly" eyes. It such a good way for me to go through all my little trinkets and find the perfect addition - note the little silver heart hanging from the ribbon.

So this project did the rounds of all the staff at work by my very happy customer, and a happy customer means a very happy papercrafter :D   Thanks for dropping by xx